How I built a weather app

Self-taught front-end developer. I've been teaching myself web development through a combination of freeCodeCamp, Scrimba, Codecademy and the general internet.
In this blog post, I'm going to discuss how I recently built a Weather app with React. The purpose of writing this article is to help me analyse and evaluate the decisions I made while designing and coding the app. Hopefully, this may also be of use to other aspiring developers!
Contents
- Introduction
- What does it do?
- Why did I build it?
- Goals
- Design
- Under the hood
- Coding notes & challenges
- Possible improvements
- Final thoughts
Introduction
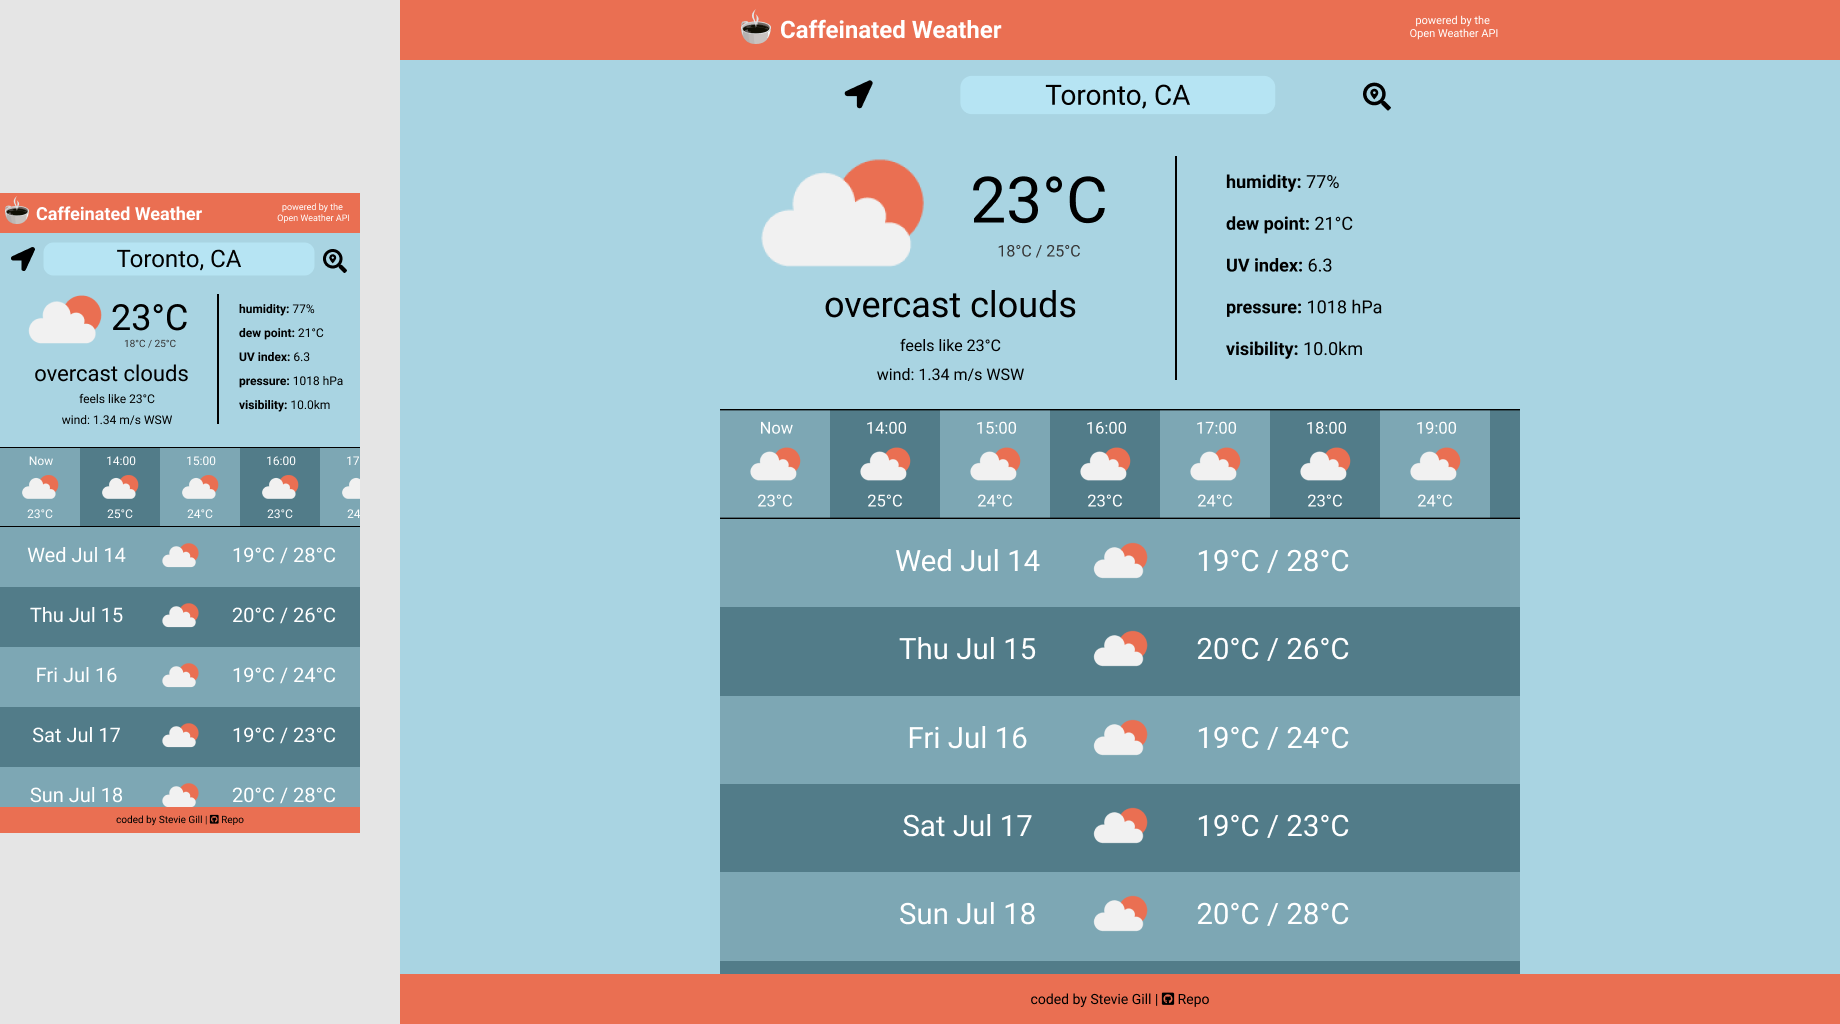
Caffeinated Weather is a React-based app that displays weather info fetched from the Open Weather API. And yes, most of my app names make references to either coffee or The Mercenary, who was my favourite character from the classic Amiga game The Chaos Engine 😀
Key features of the app include:
- a detailed summary of the current weather conditions
- hourly forecasts for the next 48 hours (horizontally scrolling)
- daily forecasts for the next seven days (vertical scrolling)
- search functionality to get the weather for any city
- metric/imperial units toggle
- an awesome loading animation I made with CSS 😀
I used the following technologies in my app:
- React, Javascript, Sass/CSS
- Netlify functions (to hide my API key)
- Axios (for making the API calls via the Netlify Functions)
- simplebar-react (for creating customised scrollbars)
- Font Awesome icons
- Google Fonts
What does it do?
On loading, the app starts by getting the user's location from their device via the browser's Geolocation API. It then uses these coordinates to query the Open Weather API, which provides all the weather data and weather icons. If the app can't get the user's location, it will default to getting the weather for Toronto, Canada. Obviously, I chose this default city completely at random!
The user can also type into the top bar to search for any city in the Open Weather API. Submitting a search term will present the user with a selection of up to five location results. Clicking on a result will fetch the relevant weather data.
If the user wants to get the weather for their current location again, they can simply click on the location-pin icon.
Clicking on the chevron icon will reveal the buttons for toggling between metric and imperial units. But who in their right mind would want to use imperial units? 😁
Why did I build it?
Many moons ago, I created a simple weather app using jQuery for a freeCodeCamp project. All it did was display a local weather summary based on the user's location. Oh, and you could switch between metric and imperial units!
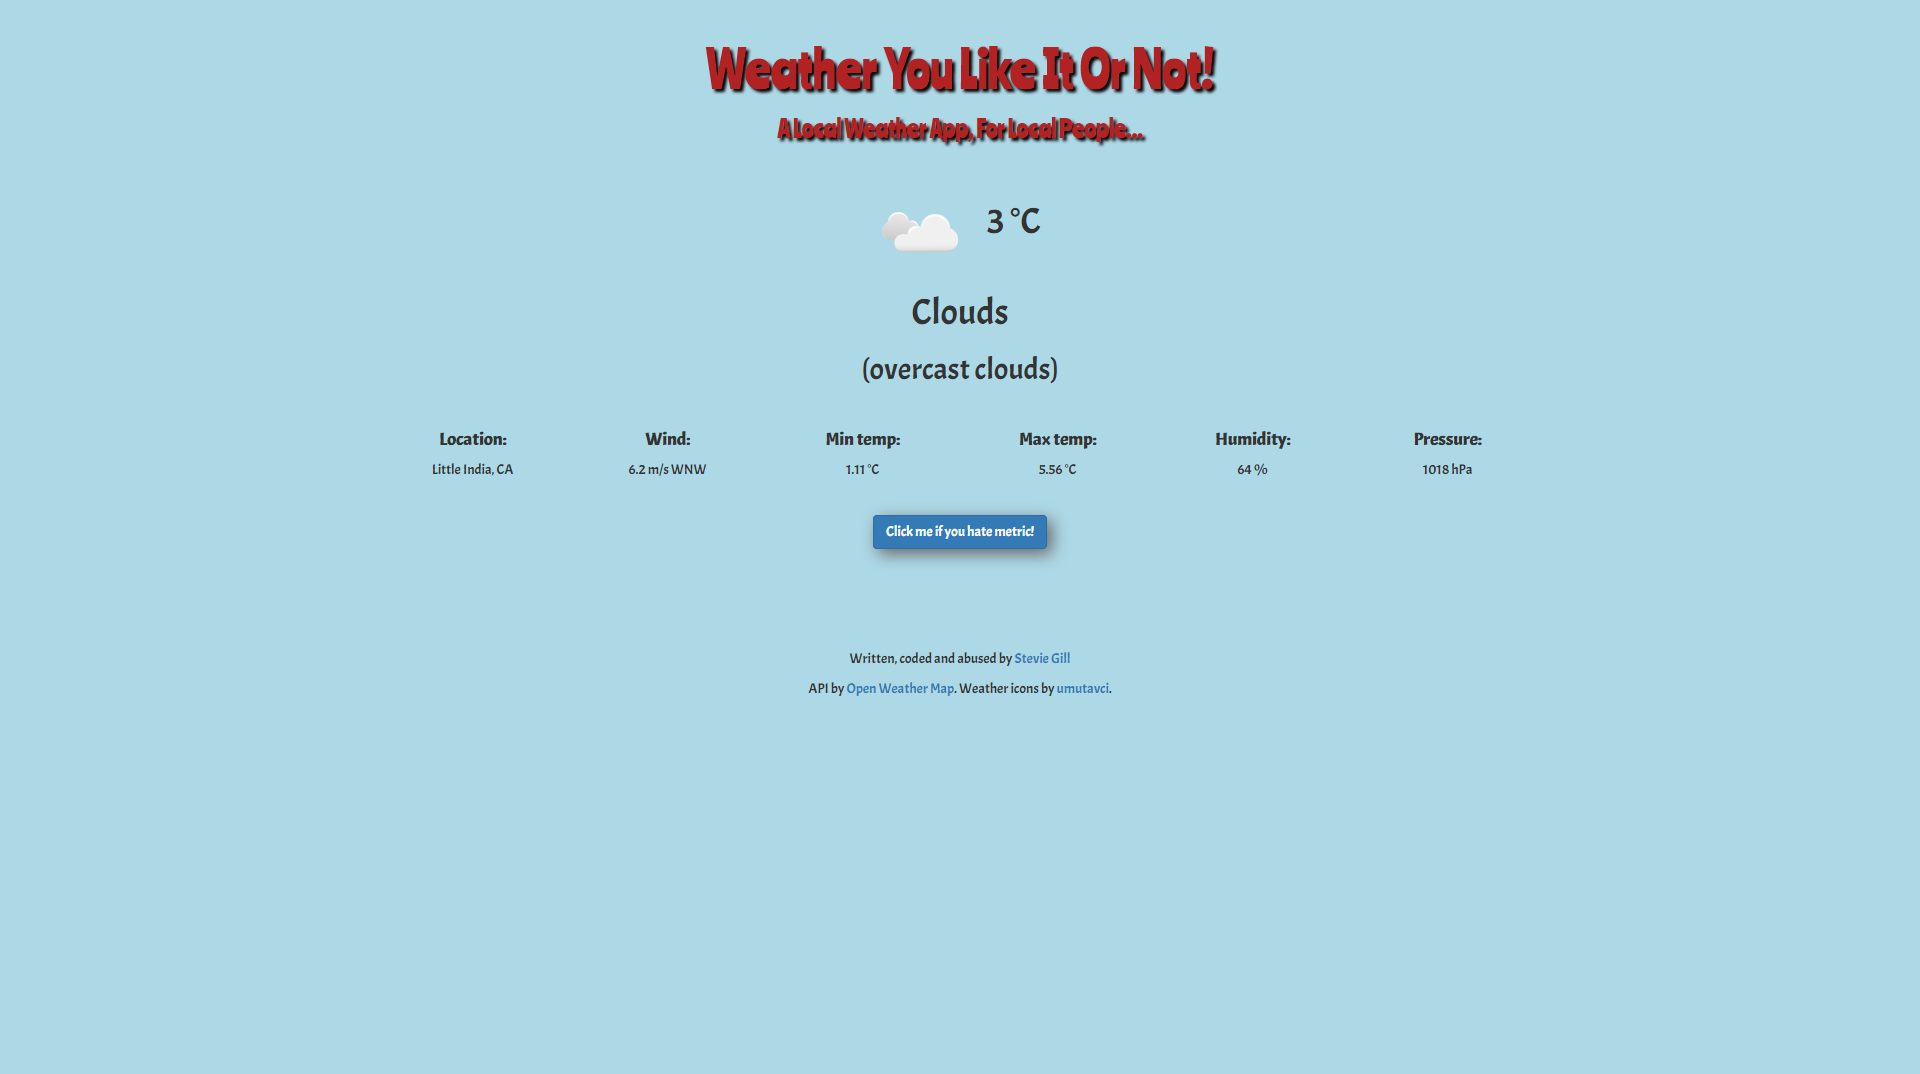
I was very proud of it at the time as it was one of the first apps I built. And it's always nice to have an app that your friends and family can understand and appreciate!
But I've grown as a developer since then and knew I could make a much better app. When I recently completed the React modules on the Scrimba frontend career path, I figured that rebuilding my weather app would be the perfect opportunity to put my new knowledge and skills to the test.
Goals
My main aim was to get to grips with React hooks and the Context API. My previous React apps all used class-based components and lifecycle methods for managing state and logic. Hooks/functional components seem to be the future of React, so it was time to hop on board!
Building a weather app was also an excellent opportunity to practice and improve my skills for working with APIs and asynchronous javascript. In addition, I wanted to learn how to hide my API key from the user.
Another goal was to learn how to use Figma to plan out a precise layout for my weather app, rather than just roughly sketching it out on a piece of graph paper! And I intended to implement a mobile-first and accessibility-conscious design.
Lastly, I was keen to expand the functionality of my original app to include hourly and daily weather forecasts. And I wanted users to be able to get weather info for any city in the Open Weather database.
Design
I designed the entire layout, excluding some tweaks, additions and oversights, in Figma and then translated it into my app using Sass/CSS.
I adopted a clean and simple mobile-first design. The intention was for all the components to fit into the viewport, with horizontal scrolling for the hourly forecasts and vertical scrolling for the daily forecasts.
For larger viewpoints, I maintained the same layout but used media queries to upscale the fonts and components to make better use of the screen space. I also installed simplebar-react to reduce the profile of the scrollbars on laptops and desktop computers.
All the interactive functionality is in the top bar, which contains several clickable icons and a text input for the city search. Search results are presented in a pop-up box that appears below the text input. Clicking on the chevron hides the search box and reveals the unit toggle buttons.
I wanted the colour scheme to complement the Open Weather icons, hence the use of orange, white and light blue. To better demarcate list items, I employed alternating shades of blue.
In terms of accessibility, I added a tabIndex attribute to all the interactive components including individual search results and made sure that the enter key can be used on interactive elements. This allows the user to navigate using just the keyboard.
I also ended up adjusting my original colour scheme (from my Figma design) to increase text contrast to meet WCAG standards. So the orange is a little darker and I changed the text on the light-blue stripes from white to black.
Under the hood
State and most of the business logic is managed from a single Context instance (WeatherDataContext) that wraps the entire app. Via useEffect() and several custom hooks, WeatherDataContext initiates the API calls that get the user's location and query the Open Weather API. Most of the data processing is done inside the custom hooks, which also call on some helper functions.
The various weather presentation components consume the data passed down from WeatherDataContext and render it appropriately. WeatherDataContext also passes down functions from the custom hooks to the interactive components (i.e. search bar and buttons), which allows the user to trigger the API calls.
Coding notes & challenges
Now I'll discuss some of the key hurdles I faced while coding my weather app.
Managing interdependent API calls
The biggest challenge I faced was managing API calls that are dependent on each other.
When the app starts, it attempts to get the user's location from the browser's Geolocation API (an asynchronous operation). It then uses these coordinates to query Open Weather's One Call API to get the weather data.
Frustratingly, the One Call API doesn't provide a city name for the location, something I was keen to display in the search bar. So, to get the city name, the app also queries Open Weather's Geocoding API with the user's coordinates.
My solution uses a combination of useEffect() and async/await syntax. Inside WeatherDataContext, the first useEffect() calls the getter function from my useGetWeatherLocation() hook, which obtains the user's location by calling navigator.geolocation.getCurrentPosition(success, error, options).
I use the async keyword with the success callback, so that I can make the function await the results from my fetchGeocodingAPI() helper.
/* the success callback for
navigator.geolocation.getCurrentPosition(success, error, options) */
async function success(pos) {
  const latitude = pos.coords.latitude
  const longitude = pos.coords.longitude

  const [city, country] = await fetchGeocodingAPI({ latitude, longitude })

  setWeatherLocation({ latitude, longitude, city, country })
}
This helper function then uses the coordinates from the browser to query Open Weather's Geocoding API to get the city name and country, which are then made available to WeatherDataContext via the state object weatherLocation.
The second useEffect() in WeatherDataContext runs whenever weatherLocation updates. It calls the fetchWeatherData() function from the fetchWeatherData() hook to query the One Call API with the user's coordinates. However, a conditional prevents this call if weatherLocation is empty.
// 2nd useEffect() inside the WeatherDataContext
useEffect(() => {
  if (weatherLocation.latitude) {
    fetchWeatherData(weatherLocation, units)
  }
}, [units, weatherLocation, fetchWeatherData])
This means that the second useEffect() will also run when the user searches for a city and selects a result, which updates the weatherLocation object. It will also run if the units variable changes, which happens when the user toggles between metric and imperial units.
Netlify Functions
As mentioned above, I wanted to hide my API key from the user. I only have a free account with the Open Weather API, so I'm not too concerned. But, I figure that it's good practice to make sure that API keys are not visible on the frontend.
The app is hosted on Netlify, so I was able to use their serverless functions to achieve this. Essentially, the API calls are delegated to a Netlify function, which can then access an environment variable containing my API key on the "backend".
So instead of making the API call directly from the frontend, the app passes the query parameters to a Netlify function via a fetch() request. The Netlify function then makes the API call and returns the response.
// example of using fetch() to call a Netlify function
const netlifyFunctionCall = `/.netlify/functions/fetchWeatherData?lat=${locationData.latitude}&lon=${locationData.longitude}&units=${units}`

const response = await fetch(netlifyFunctionCall)
const weatherData = await response.json()
Custom scrollbar
I wanted to use a low-profile scrollbar for the hourly and daily forecast boxes as the default scrollbar looks ugly and takes up too much space on desktop browsers. Modifying the scrollbar appearance via CSS is a bit of pain because of varying browser implementation (though apparently, this will improve in the near future), so I opted to install the simplebar-react library.
Using simplebarbar-react is generally straightforward, you just wrap your element in the <SimpleBar> component and pass in configuration options as props.
However, I did have an issue getting flexbox to work inside of it. Fortunately, I was able to discover the cause of this by using the browser dev tools. The <SimpleBar> component houses your content inside multiple nested elements, so you need to select the right element to apply CSS to it. In this case, I was able to target the .simplebar-content class with the display: flex rule.
Another issue was being able to add a tabindex="0" to the correct element for keyboard navigation. I was able to solve this by creating a ref and passing it down through scrollableNodeProps
// using simplebar-react
export default function HourlyForecast() {
  const { processedWeatherData } = useContext(WeatherDataContext)
  const scrollableNodeRef = useRef(null)

  const { hourlyBoxes } = processedWeatherData

  useEffect(() => (scrollableNodeRef.current.tabIndex = '0'), [])

  return (
    <section className="hourly-forecast-ribbon">
      <SimpleBar scrollableNodeProps={{ ref: scrollableNodeRef }}>
        {hourlyBoxes}
      </SimpleBar>
    </section>
  )
}
Possible improvements
At the moment, the app displays the user's local time for the hourly forecasts. So, for instance, if you're in Canada and look up the weather in a UK city, the hourly boxes will show Eastern Time and not GMT.
To me, at least, it would make more sense if the time was localized to the weather location.
Another possible feature would be to have a dynamic backdrop based on weather conditions. So, if it's wet, for example, the backdrop could be a moody photo of rain. If it's cloudy, then maybe a photo of a gloomy overcast sky. Etc.
Final thoughts
I'm very happy with my weather app and I genuinely do use it to get the forecast for where I live. Building it was fun and a great learning experience.
In particular, I learned not to ignore those pesky ESLint warnings for React, especially the ones about useEffect() dependencies. In fact, that sent me down an internet rabbit hole on using useEffect(), how React render cycles work and when to use useCallback to memoize functions. I found Sebastian Weber's useEffect() article on LogRocket to be particularly illuminating on this subject.
I also got to grips with using the context API, custom hooks, making interdependent API calls and using Netlify's serverless functions.


